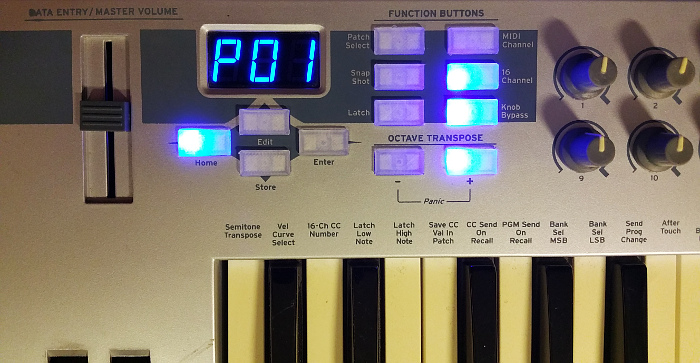
The keys of Emu the XBoard 49 MIDI-controller are not full-weighted but they still are still satisfactory good (hmm, heavy). I obtained the keyboard on the flea market last summer, for 30€, but four buttons were lost.

However, this keyboard is plagued by some weird design decisions. First and most important – there are no program up/down buttons, a sequence of buttons have to be applied (Patch Select, Plus, Enter) to change the voice.The addendum programs for Windows XP and an old Mac aren’t suitable for me (a famous Linux-gay) but without these, one cannot use even 1/10 of the keyboard potential. On the positive side are: the battery compartment with enough space to put in an extra set of the batteries and, a relatively low weight. If stolen, I would be only moderately sorry and would hunt for another exemplarr, i.e. the P/P ration is relatively good. The keys look a bit of yellowish (aging!) but hey, my initial goal was not to spend too much 😉 I only was able to find one key that generated somewhat weaker pressure – lets say straight: this is a good result for such an old keyboard.
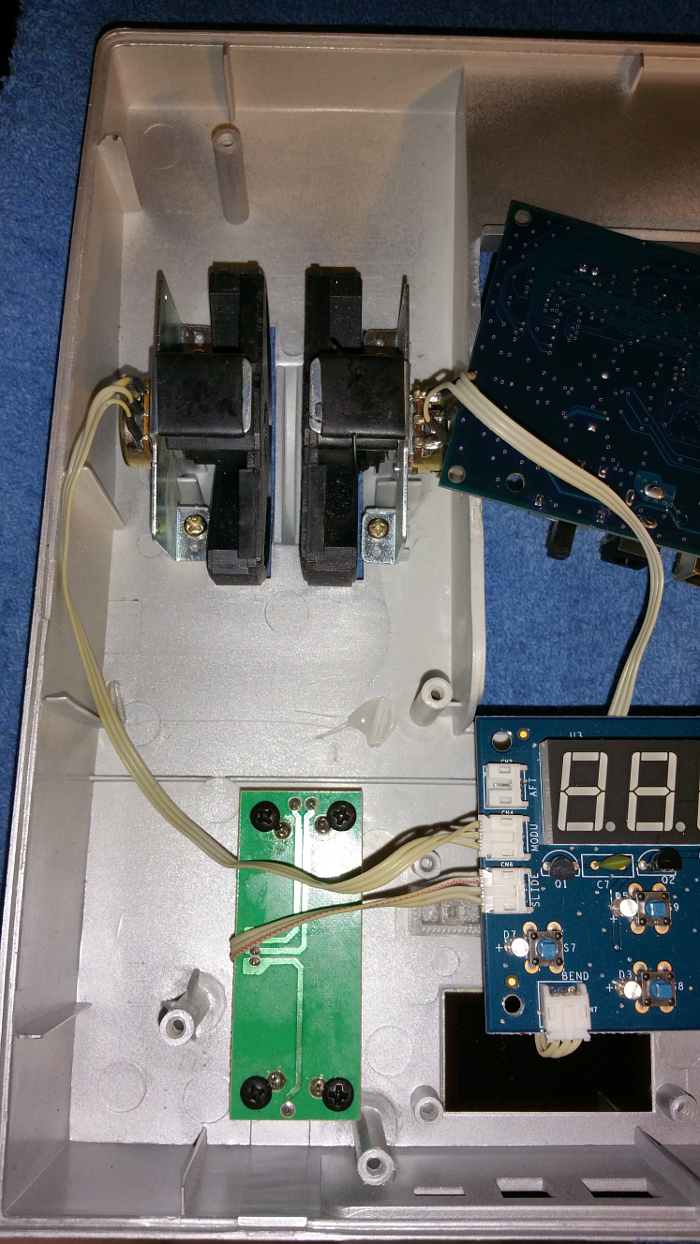
Listing the technical deficiencies now: the controller wheels are somewhat sticky (rubber starts to chemically disintegrate from the pitch bend wheel), then the aftertouch ribbon needs extra care while opening the keyboard (or it will be broken), but the most problematic issue is that the buttons have no glue applied and thus they tend to get loose and lost.
The current blog article is about replacing the buttons on the XBoard 49 keyboard. I ordered 12 new buttons 3-D printed for my keyboard (sorry, no files available).
That was the old button. As you see, it is not even glued to the switch.

Here you see the old and a new button in comparison.The extent of the legs has been extended and the lower part of the button, too. This way, the lower part of the button cannot anymore find its way out of the keyboard. Transparent color was chosen with the intent LEDs below the buttons remain visible.


Although the printing quality was relatively rough, the buttons look very nice when installed.

The LEDs are shining through the buttons.
Near the numeric LED is the “AFT”-marked aftertouch connector. While opening the keyboard, an extra care should be taken not to break the aftertouch ribbon.

Hey, somewhere around you mention discovering the service manuals for this equipment, I would like to now if it’s possible for you to share it, or maybe the link were you got if, it would really be of incredible help, please. Answer to audiocontemporaneo@gmail.com